This is an advanced technique tutorial on how to shape eyelashes on dolls. To try this you have to know how to root eyelashes first. I will do a separate tutorial on that with a different doll - I just wanted to share this one now that I took photos of the work in process, which I rarely do.
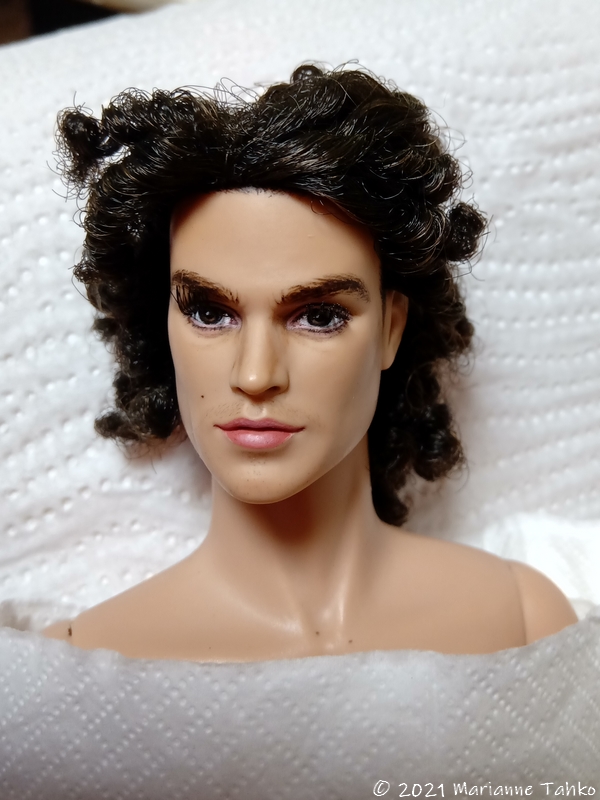
So, the model is Simon number 2, as I wanted one with longer hair and a slightly different facial expression. I'm going to describe the lash rooting just shortly here, since I didn't picture that. Okay, so here goes:
I use Nylon hair for eyelashes, because it keeps its shape much better than Saran. I typically put 3-5 hairs through each hole, divided for 7-10 holes per eye. For this particular doll, eight holes was the right amount, and the first hole in the inner corner of the eye has three hairs, the others have more. I did the lashes in three sections per eye, so that they are tied in three neat knots inside the doll's head. I used a tiny sewing needle to pull the hair knots in through the neck hole (when the head was off) with the help of sewing thread, and then I pulled the hairs gently from the outside so that the knots were tight inside.
Got it so far? Congrats! Now let's move onto this eyelash bending tutorial...
♥
Tässä harjaantuneille tutoriaali nukkejen silmäripsien taivutukseen. Ennen tällaisen yritystä kannattaa tutustua silmäripsien roottaamiseen. Teen kyllä sitä varten vielä erillisen tutoriaalin toista nukkea käyttäen - halusinpa vain nyt jakaa nämä kuvat, kun tuli kerrankin otettua sellaisia prosessin aikana.
Eli mallina on Simon numero 2, jonka tein koska halusin toisen pidemmillä hiuksilla ja pienillä ilme-eroilla. Kuvailen tässä ripsien laiton vain ihan lyhyesti, sillä en tullut kuvanneeksi sitä. Näin se siis menee:
Käytän ripsien tekoon Nylon-hiusta, koska se pitää muotonsa paljon Sarania paremmin. Yleensä laitan 3-5 karvaa joka reiästä läpi, ja niitä reikiä on 7-10 per silmä. Tälle nukelle kahdeksan reikää oli sopivin määrä, ja ensimmäisessä reiässä silmän sisänurkasta päin on kolme karvaa, muissa vähän enemmän. Tein ripset kolmessa osassa per silmä, ja ne osat ovat siisteillä solmuilla nuken pään sisällä. Käytin ripsien roottaukseen pientä silmäneulaa vetäen solmitut karvat joka reiän läpi (pää oli silloin irti) käyttäen apuna ompelulankaa, ja sen jälkeen vedin karvoja varovasti ulospäin, jotta sisälle jäi tiukat solmut.
Ymmärsitkö kaiken? Hienoa! Siirrytäänpä sitten siihen varsinaiseen silmäripsentaivutustutoriaaliin...
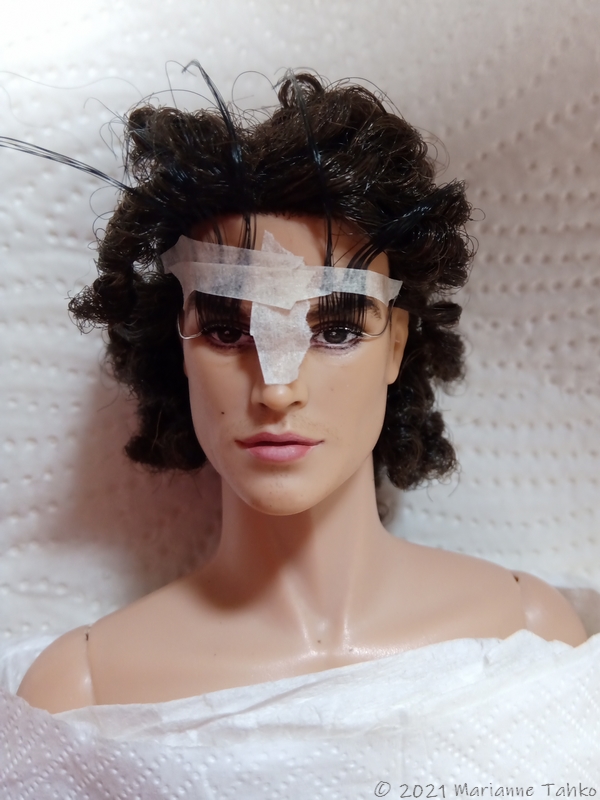
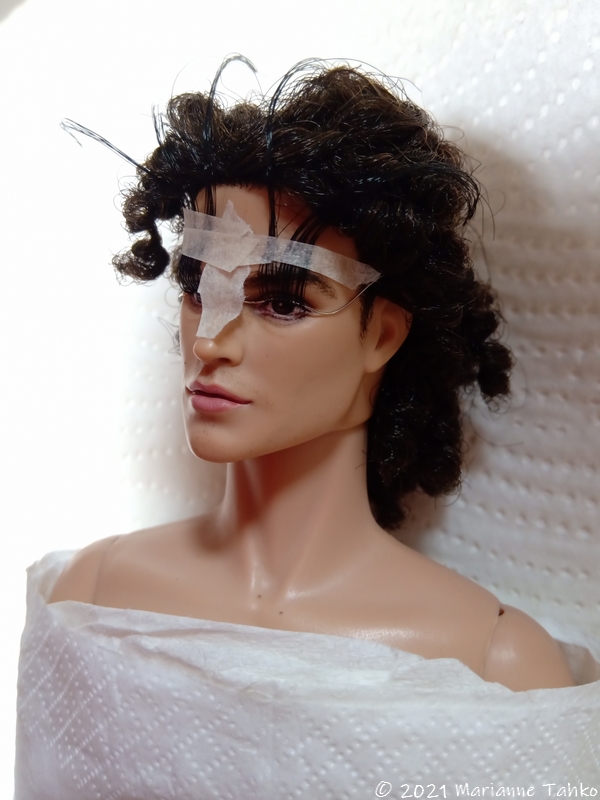
Okay, so this metal wire thingy looks like a real torture device, but it's very necessary for this technique to work. Using jewelry pliers, I give it kind of an eyeglass shape and attach it on the doll's face with masking tape, so that it stays in the right position. I then wet the face with hot water from the tea pot (without tea!) and let the super long spider leg lashes properly dry.

♥

Tämä metallilankahäkkyrä näyttää oikealta kidutusvälineeltä, mutta se on tarpeellinen tekniikkani toimimisen kannalta. Taivuttelen korupihtien avulla metallilangasta vähän kuin silmälasit ja kiinnitän sen maalarinteipillä, jotta se pysyy oikeassa asennossa. Sitten kastelen naaman vastakeitetyllä teevedellä (ilman teetä, huom!) ja annan näiden superpitkiä hämähäkin jalkoja muistuttavien ripsien kuivua kunnolla.
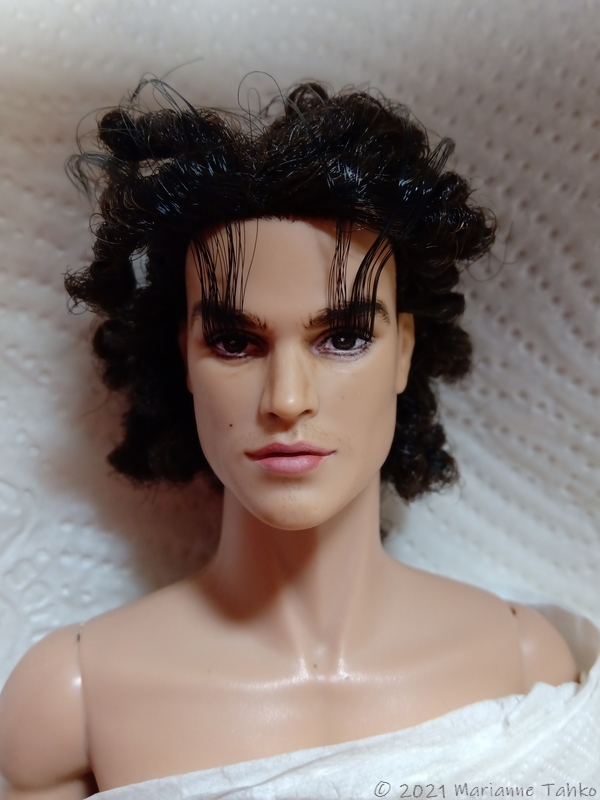
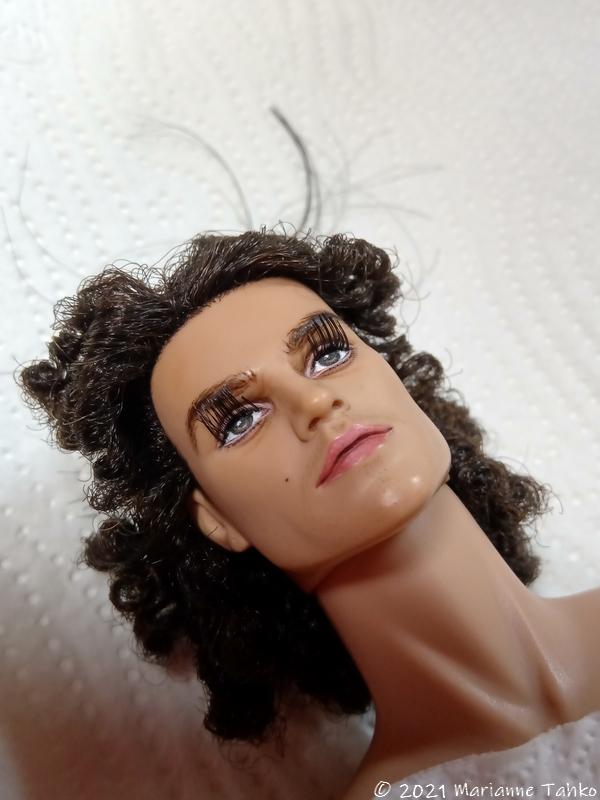
Once the lashes are dry, they keep their upward curling shape. Beautiful, right? I really like how they already look so naturally sparse; they are next to each other, not stacked on top of each other. Usually factory dolls with rooted eyelashes have such thick lashes that they shadow the doll's eyes. I don't do them like that; I space them evenly and only put enough of them for them to give the most natural possible look. This doll has 38 lashes on each eye.

♥

Kuivuttuaan ripset pitävät ylöspäin kaartuvan muotonsa. Kaunista, eikö? Tykkään todella miten jo nyt näkyy se, miten harvassa ripset ovat. Ne ovat vierekkäin pikemminkin kuin päällekkäin kasassa. Yleensähän tehtaalla rootatut nuket saavat niin paksut ripset, että ne varjostavat nuken silmiä. Sellaista en itse tee; sen sijaan laitan niitä tasaisesti ja vain sen verran kuin kyseinen nukke tarvitsee, sillä haluan mahdollisimman luonnollisen lopputuloksen. Tällä nukella on 38 ripseä kummassakin silmässä.
Of course, they need some major cutting. I cut them with sharp scissors (they have to be VERY sharp) into a length that's not quite as short as I intend them to be.

♥

Mutta tietysti ripset kaivaavat vielä kunnon leikkuuta. Leikkaan ne saksilla (HYVIN terävillä sellaisilla) pituuteen, joka ei ole aivan niin lyhyt kuin millaisiksi ne lopulta haluan.
These lashes are pointing upwards just a little bit too much. They need to be bent down a little bit, and I do that gently with my fingers. As this is a male doll, I want his lashes relatively short to give him a really natural look. For female dolls with longer lashes I've sometimes put some tape around the wire "glasses", so that the lashes bend more down from the get-go. This doll might have benefitted from that too even with the short lashes, but it's not a big deal, as the lashes are easy to bend down even when they are dry. No heating is required at this point anymore, as the lashes only need to bend from their roots, since their shape is already fine. The shaping is best to do before cutting the lashes short anyway, since you can still keep them in their place during the hot water treatment, which allows them all to behave the same way.

♥

Nämä ripset sattuvat taipumaan vähän liikaa ylöspäin. Niitä pitää taivuttaa hiukan alemmas, ja sen teen varovasti sormin. Tämä kun on miesnukke, niin haluan sille suhteellisen lyhyet ripset, jotta ne näyttävät hyvin luonnollisilta. Joidenkin naisnukkejen kohdalla olen laittanut vähän teippiä sen metallilangan ympärille, jotta ripset asettuvat jo valmiiksi alemmas. Tämä nukke olisi voinut myös hyötyä siitä vaikka sille tuleekin lyhyemmät ripset, mutta ei se mitään, sillä näitä ripsiä on helppo saada taipumaan vielä niiden kuivuttuakin. Kuumennus ei ole enää tarpeen, koska ripsien on taivuttava vain juuristaan, eikä niiden muotoa ole syytä muuttaa. Se muodon muuttaminen onkin parasta tehdä silloin, kun ripset ovat vielä pitkät, jolloin ne on mahdollista sitoa kiinni kuumavesikäsittelyn ajaksi, joten ne saa kaikki taipumaan samalla tavalla.

This is why I love Nylon hair for the eyelashes so much! It's super easy to work with. Simon's lashes on his left eye are already down enough after a few minutes of gentle pressing.

♥

Ja tästä syystä tykkään Nylon-hiuksesta silmäripsien tekemisessä! Sitä on todella helppo työstää sellaiseksi kuin haluaa. Simonin vasemman silmän ripset ovat tässä vaiheessa jo tarpeeksi alas taipuneet, eikä siihen tarvittu kuin muutama minuutti varovaista painelua.
And this is how they should look like:

♥

Ja tältä niiden tulee näyttää:

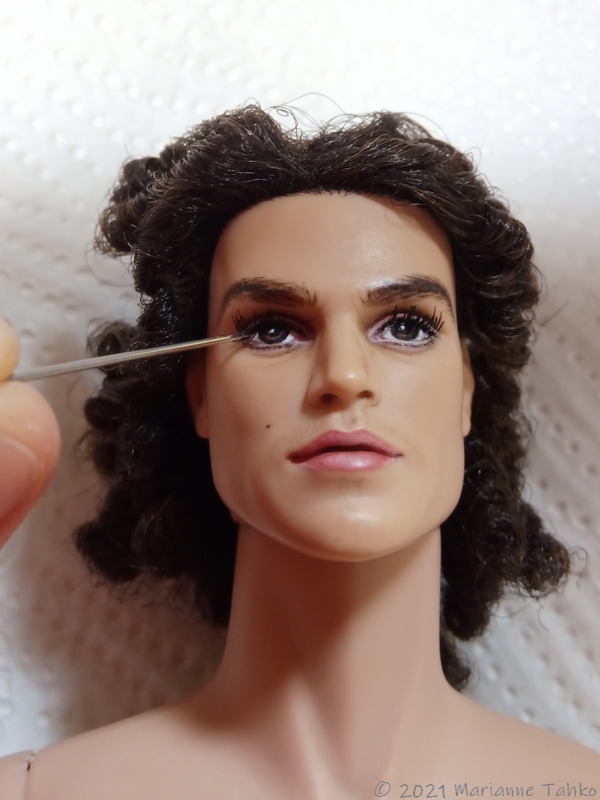
I've cut all the lashes almost the same length, and now it's time to cut them even shorter INDIVIDUALLY. This is a very nerve-wrecking process. I don't want to cut them too short and not leave them too long either. I cut them in the shape of real eyelashes, which means that most of the shortest ones are on the inner corners of the eyes. A needle is required to separate them for easier indivual cutting, so that I don't cut two lashes next to each other the same length! God forbid if that happened... The needle may come back in handy if any individual lash still doesn't want to go in the right direction; I simply push the lash slightly in its root. I also push with the needle point in the middle of the bunch of lashes coming from each hole, as this helps separate them and camouflages the fact that several lashes grow from the same hole. Not that you can actually see the holes anyway if you have done the rooting with a tiny needle.

This is pure fine tuning and not required if you're not the kind of freaky perfectionist as I am. Dolls look absolutely fine even when you can see how many of their eyelashes grow from just one hole! And even if their lashes are all the same length.

♥

Olen leikannut nuken kaikki ripset lähes tasapituisiksi, ja nyt on sitten aika leikata niitä lopulliseen pituuteensa YKSITELLEN. Tämä on hyvin hermojaraastava prosessi. En halua leikata ripsiä liian lyhyiksi, enkä toisaalta jättää niitä liian pitkiksikään. Leikkaan ne samaan muotoon kuin oikeat silmäripset, eli valtaosa lyhyimmistä ripsistä löytyy silmän sisänurkasta. Neula on tähän tarpeellinen, jotta saan eroteltua ripset toisistaan ja niiden leikkaaminen yksitellen helpottuu - enhän halua leikata kahta vierekkäistä ripseä samanpituisiksi! Se olisi aika epämukavaa... Tässä vaiheessa voi käyttää vielä neulaa yksittäisten väärään suuntaan taipuvien silmäripsien kesyttämiseen, ja lisäksi painan sillä ripsien juurista kustakin reiästä tulevan ripsitupun keskeltä erottaakseni tupun ripset toisistaan, sillä tämä auttaa naamioimaan sitä, että useampi ripsi kasvaa samasta reiästä. Eipä sillä, että ripsien reikiä oikeastaan näkyisi muutenkaan, jos olet tehnyt ne pienellä neulalla.

Tämä on nyt sitten niin tarkkaa tuunausta, ettei sellainen ole välttämätöntä, ellet ole yhtä hullu perfektionisti kuin minä. Nuket näyttävät kyllä hyviltä, vaikka näkisitkin miten monta silmäripseä niillä kasvaa yhdestä ainoasta reiästä! Ja myös silloin kun ripset on leikattu tasapituisiksi.
But yeah...  This is actually what I was after: scarily hyperrealistic eyelashes!

♥

Mutta siis... Kyllä tämä on sitä mitä tavoittelin: pelottavan hyperrealistiset silmäripset!
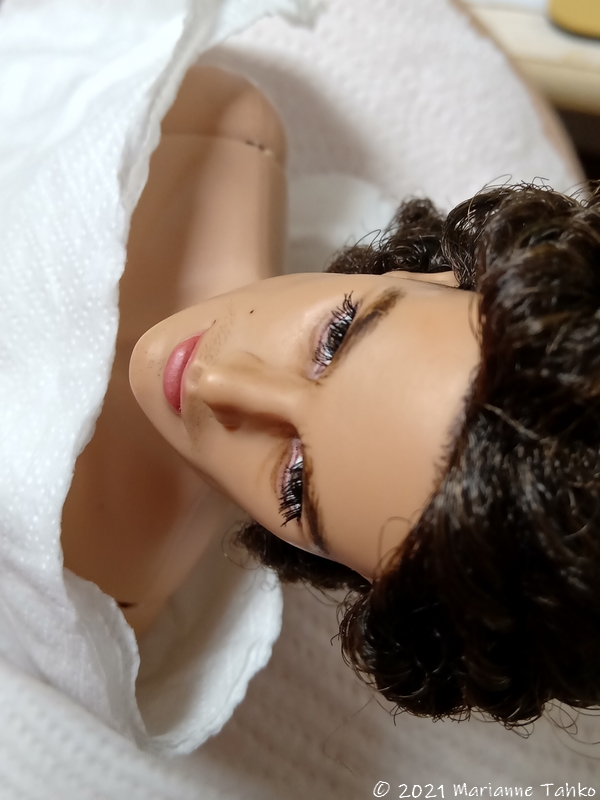
Looking good there, Mr. Deforest!

♥

Näyttääpäs herra Deforest nyt hyvältä!
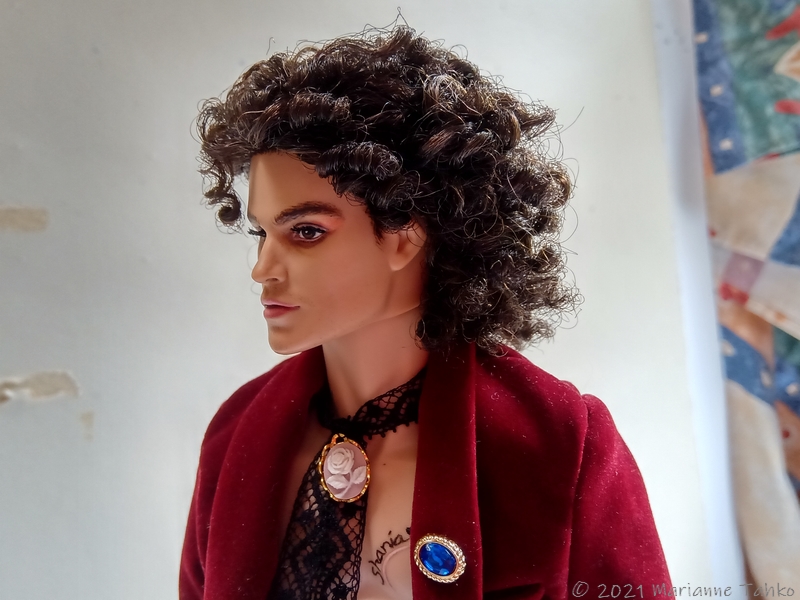
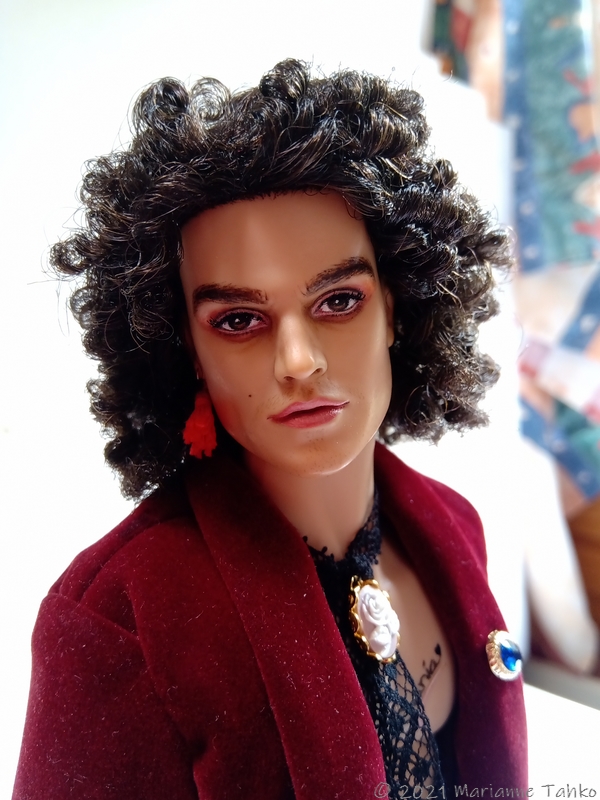
Simon's eyelashes are very subtle - definitely much more so than this bold burnt orange eyeshadow! (Which I did with watercolors for only a temporary make-up look.)

♥

Simonilla on hyvin hienovaraiset silmäripset - ehdottomasti paljon enemmän sellaiset kuin hänen rohkea poltetun oranssin sävyinen luomivärinsä! (Joka on muuten vesiväreillä tehty ainoastaan väliaikaista meikkiä varten.)
Now if only the real ones looked this good 😋😋😋